Pages

As for me and my blog, we will serve the Lord.


Thursday, December 29, 2011

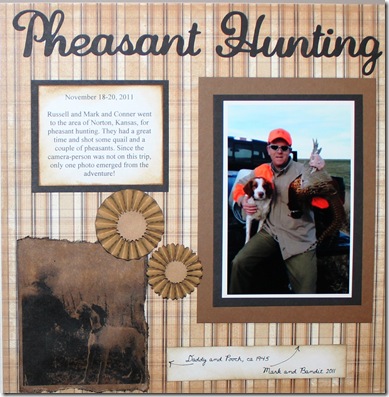
A Heritage of Bird Hunting (Scrapbook Page)

IMG_0819 

Having completed the 12 Tags of Christmas as my introduction to the Tim Holtz technique, I was determined to implement some of the vintage techniques into my scrapbook pages, as this is the primary “crafting” that I do. I had just about completed my current layout (from November) when I received the rosette die. I thought it looked very difficult when I saw others use it, but it in fact was quite simple. So, I used that to embellish the page.

This evening I also watched Tim’s video on some ideas for using the kraft glassine paper (love it). When I saw his idea of printing a photo on the glassine paper, I knew how I wanted to bring that element into this scrapbook page, as my old photo of Daddy with Pooch came to mind. The photo was very faded, so first I edited it to make it a more intense black and white photo.

Obviously, due to the nature of the kraft glassine paper, the photo does not show up as well as it does in person. I am pleased with the effect and love the whole vintage idea of displaying a photo of my dad with his bird dog as an embellishment to the modern-day picture of my son with his bird dog.

Thursday, December 22, 2011

12 Tags of Christmas – Day 10

Day 10 - Barbara FordWhew! I did it! When I first started with the 12 Tags, I really did not intend to do all 12. The more I did, the more I wanted to do, until I finally realized it was imperative that I finish the task. It has been very challenging but fun, and I have learned so much, and have a new appreciation for the vintage technique, as it appeals to the “feel” I have always had for relishing the wonderful things of times past.

I “winged it” on the embellishments at the bottom, as I am also learning to find things around the house that I can use to enhance a tag.
The facet ornaments that I created using suggestions from Tim did not turn out as vibrant as his, and it could be because I “made do” with heavy duty aluminum foil rather than purchasing the metal tape. Still, they are fine.
Next year, I need to get the tags done within the 12 days. Finishing up this last one has been a challenge, as our Christmas is tomorrow evening and Saturday, and things are a-flurry here with last-minute wrapping, baking and cooking.

I think there is something fundamental here, in my joy in creating these tags—it has been fun to do something with my hands, to actually create something enjoyable and lasting (I hope), as I think about the real reason why I love this season so much—the celebration of the birth of Christ, He who is the reason for the joy in my heart—in this season, and all the year round.

Merry Christmas!

Tuesday, December 20, 2011

12 Tags of Christmas – Day 11

Day 11 - Barbara Ford

I used glossy card stock on all the parts of this tag. Alcohol inks provided the colors for the holly leaves/berries/branch (Meadow, Lettuce, Red Pepper). I inked the edges with Walnut Stain. The branch was especially fun, because I didn’t have a brown alcohol ink, so I used the Butterscotch and after it dried, I inked over it with Walnut Stain. The tag itself is a combination of several of the blue distress pads. The snowflakes on the blue background were created with water splatters. The ribbon was white; I stained it with the Festive Berries distress ink pad.

Thursday, December 15, 2011

12 Tags of Christmas – Day 8

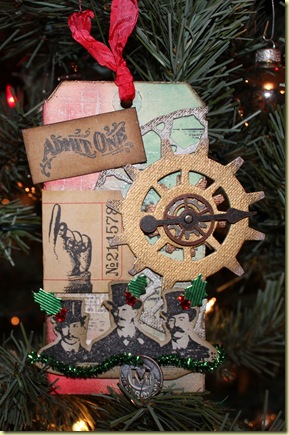
Day 8 - Barbara FordWell, this was an interesting challenge for me. I waited to do this one until I could get my hands on some of the supplies needed. I wanted to follow Tim’s suggestions as closely as I could for Tag 8, because I was intrigued by the “steampunk” theme. It evokes good feelings about a bygone era. In fact, I am finding that the  entire “vintage” technique is right down my alley.

Wednesday, December 14, 2011

12 Tags of Christmas – Day 12

Day 12 - Barbara Ford 

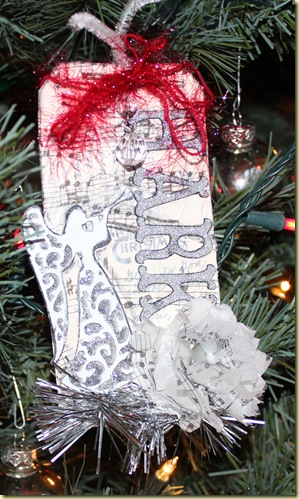
Starting with a blank manila #8 tag, I stamped some Merry Christmas sentiments, and in the spaces around the stamps, I wrote some passages from Luke 2. After “whitewashing” the tag with Picket Fence stain, I then glued tissue wrap (symphony) over the entire tag and then covered it all with Rock Candy Stickles.

I followed Tim’s instructions for the tissue wrap flower, and I was surprised it was so easy!

I cut an angel on the Cricut, from the Christmas cartridge, on grunge paper. I painted the blackout piece with Silver (dabber paint) and the overlay of the angel with Snowcap (dabber paint). The letters for “Hark” were cut on the Cricut from the Storybook cartridge (using American Crafts glitter card stock). I inked all edges with Black Soot Distress Stain, and added some tinsel and “ribbon.”

Sunday, December 11, 2011

12 Days of Christmas – Day 9

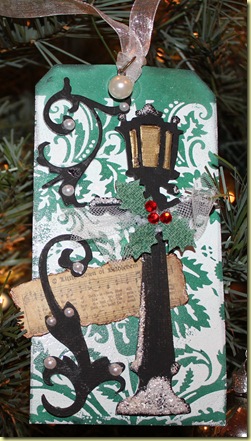
Day 9 - Barbara FordTim’s tag for Day 9 used a combination of red and green (Festive Berries and Evergreen Bough) distress ink. I wanted to do something a little different, color-wise. Using the double embossing technique he demonstrated, I first stamped the tag with a Hero Arts stamp (not the one Tim used) with a white pigment ink and heat embossed it with clear powder. Then I stamped over the dry image with Evergreen Bough distress ink. I loved the way it looked as I applied this color. This is my new favorite color! Then I put clear embossing powder over all and heated again. This tag gave me the opportunity to use the charming little lamppost! Love it! For the soft glow in the lamp, I painted a little square of a kraft tag with the gold dabber paint. Applying a thick layer of Glossy Accents gave it the look of glass. For the “snow” I used Picket Fence Stickles.

So far, this one is my husband’s favorite!

Thursday, December 8, 2011

12 Tags of Christmas – Day 7

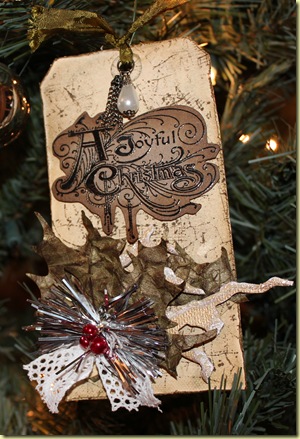
Day 7 - Barbara FordMy first opportunity to work with glassine paper, it will not be my last! I really enjoyed staining it with alcohol inks and then wadding it up several times to create the “crushed look” before cutting the holly leaves. That was my favorite part of this project. Using alcohol ink (cranberry) to color the pearls for the holly berries was fun. Interestingly, the silver tinsel in the lights of the Christmas tree make it appear that there is red also on the tinsel—it’s just a reflection of the red berries.

I also enjoyed a new technique (for me) of “ghost stamping” on the background of the card. I also particularly enjoyed using black embossing powder—very dramatic!

Wednesday, December 7, 2011

12 Tags of Christmas – Day 6

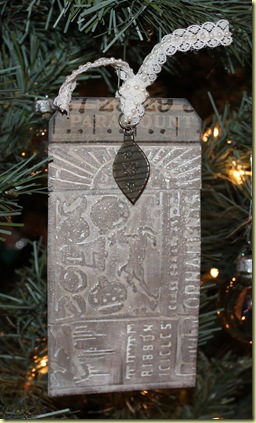
Day 6 - Barbara FordWhen I saw Tim’s tag for Day 6, I knew that I would have to do my own take on this one for sure. I knew I wanted to go for a monochromatic look. I started playing with it, and it took shape on the fly. I did use the tin, but I used heavy-duty aluminum foil, adhered to glossy cardstock. After running it through the Vagabond in the vintage texture fade, I coated it with Picket Fence, let dry and burnished lightly. I heat embossed it (clear) and then inked it with Walnut Stain—had no idea that Walnut Stain on top of burnished Picket Fence on foil would result in this soft taupe color that I love.

One of my trials resulted in cutting off some of the bottom of the design, so after adhering the material to a tag, I had some open space left at the top. I used a little piece of vintage matching paper from the Christmas Memories stash. I swiped it with Picket Fence and then Espresso paint and let dry. I inked the edges of the finished tag with Black Soot.

I pulled out an old Christmas ornament charm, painted it with Espresso dabber, dried it, and embossed it with clear powder. I used a pearl ribbon from my stash. Totally different, and I like it (frankly).

12 Tags of Christmas – Day 2

Day 2 - Barbara Ford

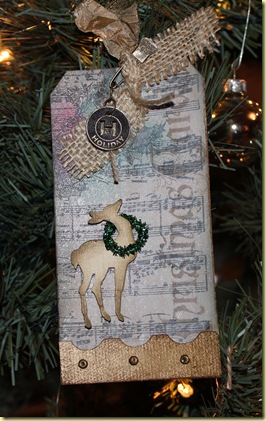
This tag is out of sequential order because I kept waiting for some supplies to arrive. Since they are not here yet and I don’t like partially-completed projects, I finished up with what I had on hand. I made my own little border with the Cricut and distressed the little brads with—believe it or not—a meat tenderizer hammer. After “whitewashing” the background with Picket Fence, I wanted to draw a little more attention to the gold resist words “Christmas Carols,” so I put a little Perfect Pearls Medium on the letters and then brushed on some Perfect Pearls gold. I am pleased with the results.

I like the feel of this tag. I love anything with music. I love little deer.

Tuesday, December 6, 2011

12 Tags of Christmas – Day 5

Day 5 - Barbara Ford

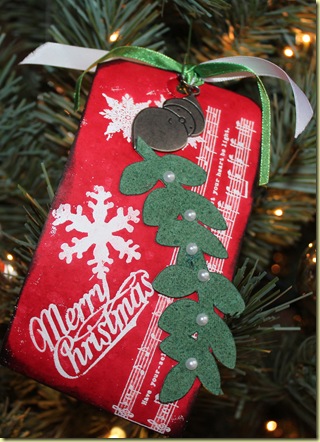
This one was considerably more simplistic, because I made it that way. I did not follow very much of Tim’s example, except that it is a resist (I think it is anyway—sorry—all so new for me). I took a regular manila tag, and on it I stamped snowflakes from Tim’s stamp sets, a line of music (“Have Yourself a Merry Little Christmas”) with a wood stamp from Michael’s, and “Merry Christmas” from one of Tim’s sets. I stamped with VersaMark and then heat embossed with white powder. Then I used the Winter Seasonal Festive Berries ink pad and covered the pad with the pad-to-tag method, the embossed stamped images acting as a resist to the distress ink. I flicked a bit of water onto the tag, just to break up the extreme red (though I was ready for a RED Christmas tag!!).

I did not have the die that cuts the wreath, so I cut branches from my Cricut (Martha Stewart Seasonal Cake Art) from grungeboard to make a mistletoe sprig. I used Cricut Craft Room so that I could make the branches a little skinnier. I added pearl bling for the mistletoe berries. I inked the branches with Pine Needles (pressing down the blending tool). I inked the edges of the tag with Black Soot Distress Ink.

The Santa metal charm is something I have had on hand for several years.

As I mentioned, I am decorating my lower level Christmas tree with these tags!

Monday, December 5, 2011

12 Tags of Christmas – Day 4

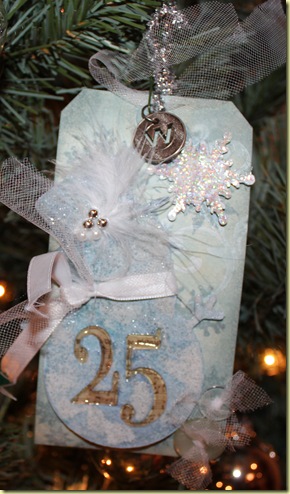
Barbara Ford 12 Tags Day 4Oh my. I wouldn’t want to count the hours I spent on this one. Unless you have made a similar tag, it impossible to guess the level of activity this project required! But I was so motivated by the beauty of Tim’s tag that I just wanted to do it. So, here it is. I’ll only mention the techniques/supplies I used that were different than Tim used.

To cover the tag, I used the Weathered Wood and Tumbled Glass distress ink, but I did not have the bottles of stain, so I used it from the ink pads, applying directly to the craft sheet and mixing with the Picket Fence stain, then dragging my misted tag through it. I used some of Tim’s snowflake stamps to stamp with Weathered Wood on the tag, once inked.

Probably the funnest part of this project was inking on top of the dried Rock Candy crackle paint. Not having the distress stains, I used the suggested colors (Weathered Wood and Tumbled Glass—becoming my favorite combination!) directly from the ink pad, using the ink blending tool to pat it on pretty heavy (dried with heat tool). I took several photos of the tag in different lighting, but in all of them, the snowman looks more mottled than he does in real life.

I did not have Tim’s snowman die, so I cut a snowman (and a snowflake) from my Cricut/Creative Memories Cheerful Seasons cartridge. I cut the snowman from grungeboard and the snowflake from grunge paper (love that stuff). I love Stickles Crystal Ice and used it on top of the snowflake, after coating it with Picket Fence.

On the little snowman guy’s hat, I ran a strip of Rock Candy Stickles along the top, as Tim suggested, but I wanted a bit more bling on the “snow,” so I sprinkled some Martha Stewart Crystal Coarse Glitter on top, while the Rock Candy Stickles was still wet.

I was able to use the 25 Movers & Shapers Die and run it through my Vagabond with the snowman cut from the Cricut.  I had the buttons on hand (they are perfect, much better in person as far as shade of color). A fellow crafter gave me the hint to use a dental floss threader to bring the tulle through the button holes. Worked like a charm!

For the white flourish, I used a clear stamp I had on hand and stamped it with white pigment ink, dried it with the heat tool.

All this is new to me. I feel very challenged and am learning so much. It was fun looking for “tulle,” something I had not thought of since my mother made my wedding gown and veil 46 years ago!

Oh, and my white feathers did not come from Mario’s bird!

Also finished my version of Tag 5 today. Will upload it next.

Saturday, December 3, 2011

12 Tags of Christmas – Day 3

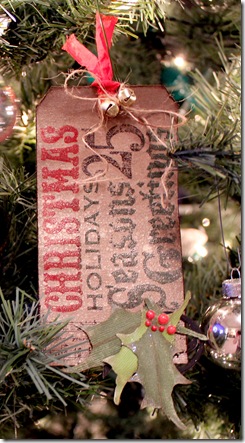
IMG_0319_picnikYes, I skipped a day. I am waiting for some supplies to complete the Day 2 tag. So, here is the tag for Day 3. I have three trees in my house; the lower level tree has only lights and silver balls. I am using my tags to decorate that tree.

I did not have the embossing folder that Tim used, and I was not motivated to try the stamping technique that he demonstrated (making the stamp pad and then using two tags). So, I used my Distress Ink Pads to stamp a kraft tag and then heat embossed with clear embossing powder. I used Festive Berries, Barn Door, Fired Brick, Evergreen Bough, and Pine Needles. I used a music stamp “Have Yourself a Merry Little Christmas” across the bottom, also heat embossed. I frayed the edges of the tag and then inked the edges of the tag with Iced Spruce, Frayed Burlap, and the very edge with Walnut Stain.

This was my first experience with Perfect Pearls (Heirloom Gold). I think the technique will get better with time, but I was pleased with it, for a first try. The tag has a gold glimmer that I was not able to capture well with my camera.

I used some greenery that was left over from the Day 1 tag, and I implemented Tim’s idea for staining the bling-on-a-roll. I could not find the Red Pepper Alcohol Dye, so I bought a set that had a red in it, and it happened to be Watermelon. I used a couple of coats. Would have preferred a deeper red. An alternative would have been to use Christmas Red Stickles on top of the bling, but then the pearlized effect would have been lost.

For the ribbon, I used a trimmings piece and stained it with Festive Berries. I added the natural twine and a couple of jingle bells—for me, they have to be gold and not silver, since the overall hue of the tag is gold.

Side note: Several years ago, before I knew I could do anything at all with crafting, even before I started scrapbooking, my daughter bought a glue gun for some altered art around her house. At that time, I told her she must be adopted. A glue gun? Are you kidding me? I couldn’t even imagine going inside a Michael’s. My how things have changed! I guess she’s not adopted after all—she recognized the “genes” before I did! This is such fun!!

Thursday, December 1, 2011

Twelve Tags of Christmas

Tim Tag #1 2011

I am SOooooo out of my comfort zone. I have been experimenting with some new crafting techniques. I am participating in Tim Holtz’s 12 Tags of Christmas. (I posted my first attempt at the TH technique, a Thanksgiving tag, a few weeks ago).

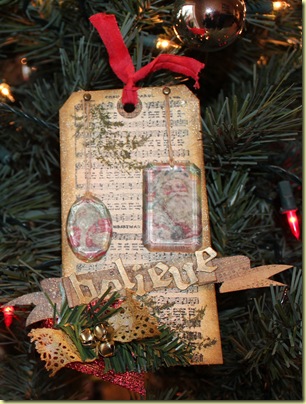
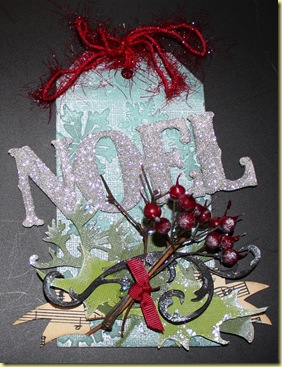
For me, participating in the Tim Holtz world-wide event means I go to his blog, watch his tutorial on the creation of the tag, and then adapt it for myself, using the supplies I have on hand. This one was a challenge, since I don’t own all the dies and supplies he used in the tutorial. I used all three of my cutters: Cricut for NOEL (cut from grungeboard) and some of the greenery, Silhouette Cameo for the tag itself and the music banner, and the Vagabond for the holly. Also used the Vagabond for dry embossing the tag, which I then heat embossed with Bridal embossing powder. I used several Ranger Distress Inks and paints. The color on this tag features Tim’s new seasonal winter color, Winter Spruce.

It was fun using a lot of the things I have had on hand for a long time. However, I am not a glitter person, and now it seems my entire hobby room is covered with Martha Stewart Sterling glitter. The holly berries are from a discarded centerpiece. For the music banner (only the edges are seen from the top view), I scanned my vintage (authentic) copy of “White Christmas,” printed it on cream cardstock, cut the banner out of it, inked the edges and folded it.

I’m tired now. I don’t see myself doing all 12 of the tags—there are other things to be done, like my life and Christmas shopping.

But, it was really fun. And, it is another chapter in “enjoying my hubby.” Oops, hObby….. VBG…

Saturday, November 19, 2011

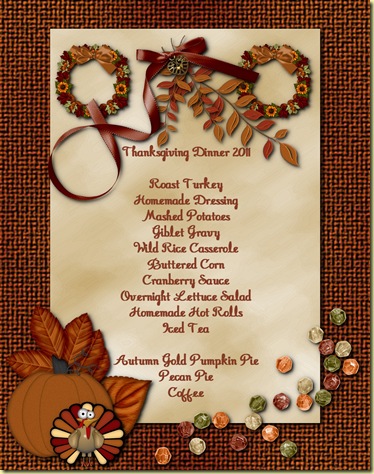
Thanksgiving Dinner Menu

Thanksgiving Menu 2011

I have always “posted” our menu in the kitchen for major holiday meals. Since I have been experimenting with digital scrapbooking, it has been fun to create the menu on a digital page.

We are thankful for so many blessings, and I love that there is a special day of the year to give special attention to that thankfulness.

Friday, November 18, 2011

Autumn Craftings

IMG_0276

Experimenting with some new craft techniques is refreshing. For me, all projects must have an end-game. That is, I create not only for the fun of the process. While I do enjoy the process, it’s the product (or the output) that is my motivation. For me, the purpose for my projects is their ultimate inclusion in my scrapbooks.

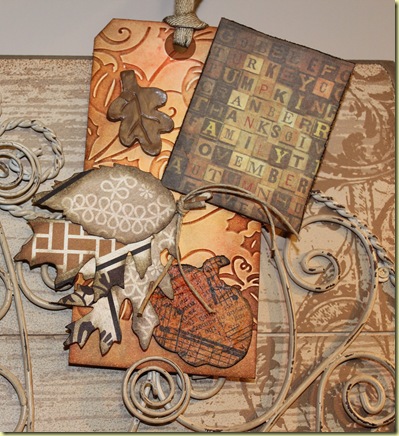
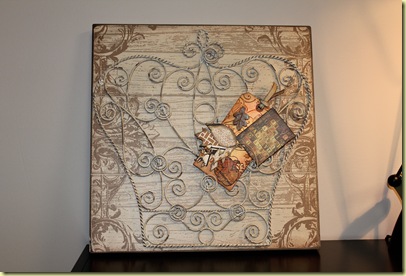
I am having fun using Tim Holtz techniques and products. This is new for me. I created my first “tag” today, and will display it on this photo display plaque until such time as I find a place for it on a scrapbook page. This is my first “tag,” and so it looks lonely on the display plaque right now!

IMG_0280

IMG_0279

I used the Vagabond die cutting/embossing machine and Tim Holtz Tattered Leaves die to cut the leaves from patterned cardstock, and then inked the edges with Walnut Stain. The tag is embossed with a Cuttlebug pumpkin embossing folder. With the Tim Holtz Pumpkin and Acorn die, I cut the pumpkin on the Vagabond, from grungeboard. I then made a collage on the pumpkin with TH Tissue Tape, which I then stained with Spiced Marmalade and Ripe Persimmon. The Distress Ink pads that I used on the tag itself: Walnut Stain, Ripe Persimmon, Spiced Marmalade, and Frayed Burlap. The cardstock with the Thanksgiving words is from Tim Holtz Seasonal Stash. I frayed the edges and then inked it with Walnut Stain. The metal leaf is something I have had on hand for several years. I died the fabric tape with Walnut Stain.

I got some inspiration from tags I found for my Pinterest board.

Friday, November 11, 2011

Happy Veterans Day to My Hubby, et al

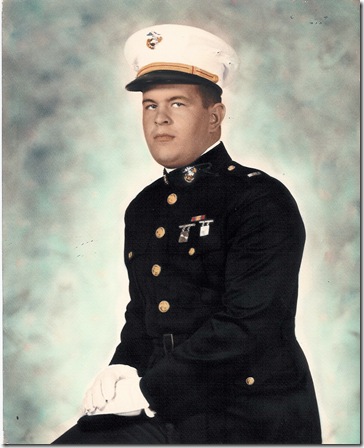
russell a ford usmc may 25 1968 May 25, 1968, Camp Lejeune, NC

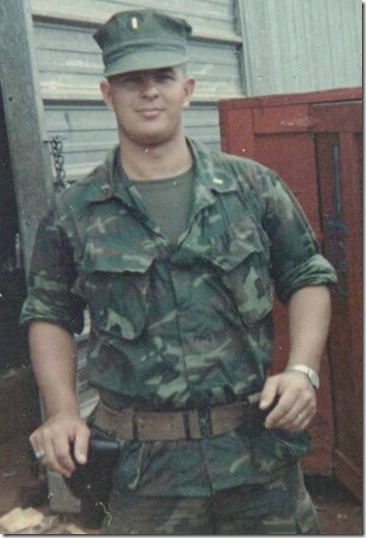
My husband’s military service is a special part of his personal history, and as such, an important part of our family history. We were married in 1965, during the height of the Viet Nam War. He graduated from college in May of 1967, and having passed the qualifying test the previous winter, had been sworn in as an Officer Candidate in the United States Marines. He was commissioned as a 2nd LT in the spring of 1968, and after Officer Candidate School and The Basic School, followed by Supply School, he spent a 13-month tour of duty in Viet Nam. While in country, he was promoted to 1st LT. He was honorably discharged as a Captain, USMC.

My pride in his service to our country is only exceeded by my pride in his service to our Lord. But, stronger than either of those sources of pride, and foundational to both, is my pride in who he is. He served because he wanted to serve, because it was an honor to fulfill his patriotic duty.

One day I may write a book. For today, as we celebrate Veterans Day, I’ll just post a few pictures from the “olden days” – the days when military personnel and their loved ones could not even communicate by telephone, much less web cams, Skype, email, chat, etc. We communicated only by letter (real letters) for 10 months. Then we met in Hawaii for R&R. Then another three months of letters-only, before his return home. Yeah, THOSE “olden days.”

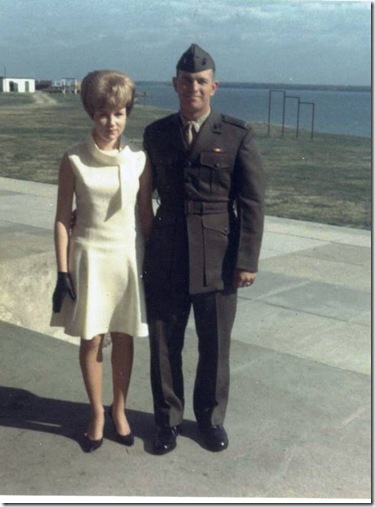
 2nd LT Russell Ford and Wife at OCS Graduation

Nov 1967 Newly-commissioned 2nd LT Quantico, VA

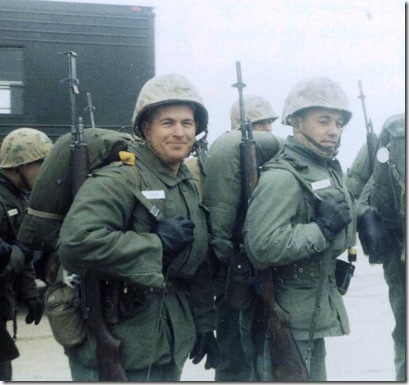
 3-13-1968 Leaving for practice amphib landing at Little Creek during TBS Training Exercise, Quantico, VA

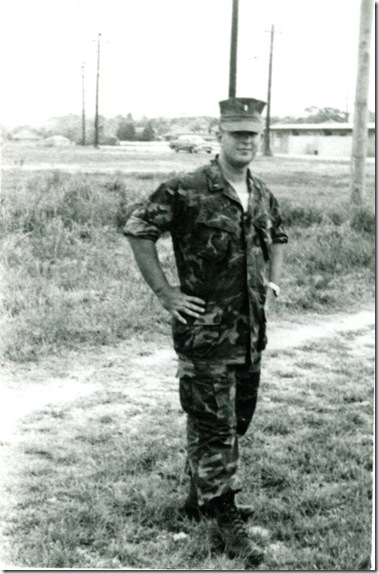
May 25 1968 at Camp Lejeune NC

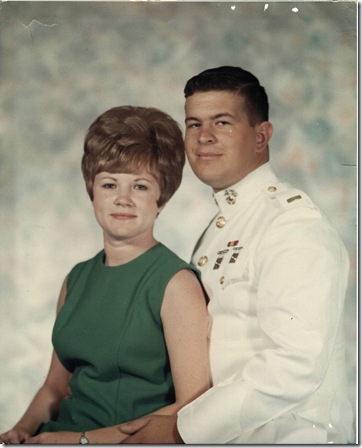
May 1968, Camp Lejeune, NC


Following pictures are from Viet Nam:

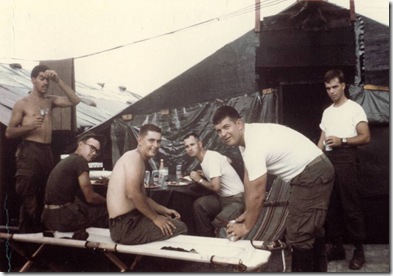
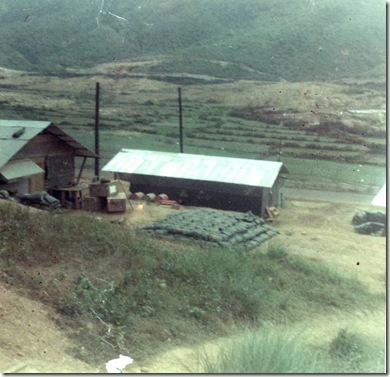
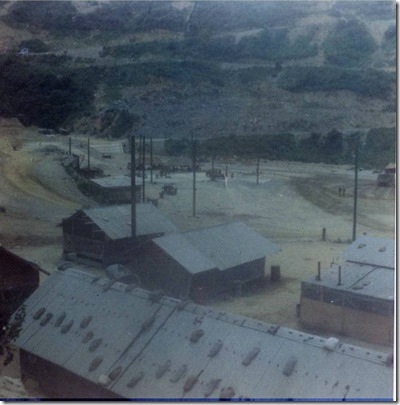
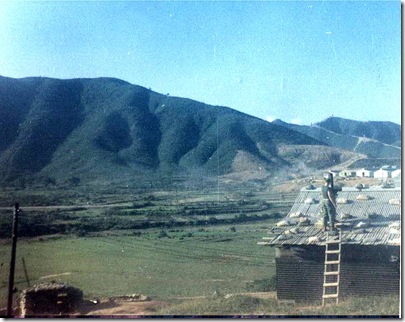
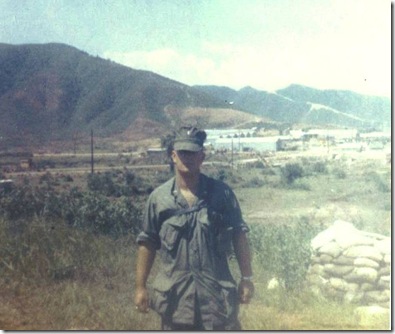
11-10-1968, USMC BDay visiting Bud Harness  in DaNang Steak Cookout center, supply office-rice paddies in bkgrnd where R engaged enemy Feb 23 1969   Hooches at 2-7 and same type as 1-13  Mtn outside Russells hooch, 1-13, west of Da Nang

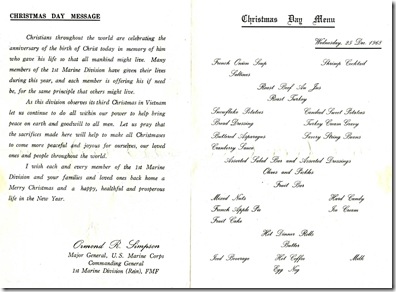
Christmas Day in Viet Nam 1968  Photo of Russ Ford and Rich Gleittsman, taken at camp before Russell left for the world 1969  Russ at 3rd MAF HQ, Da Nang in bkgrnd

Russ at Camp Hansen Okinawa for Embarkation Sch Mar 1969

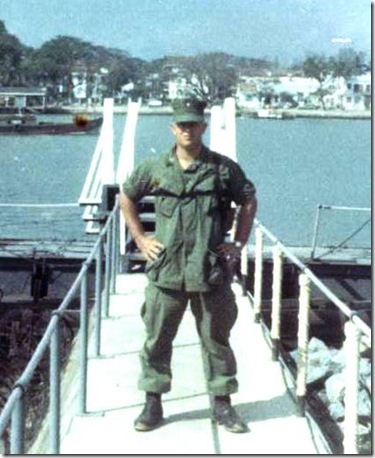
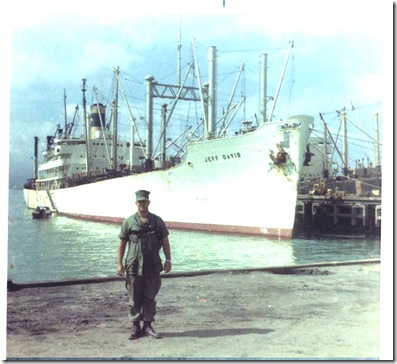
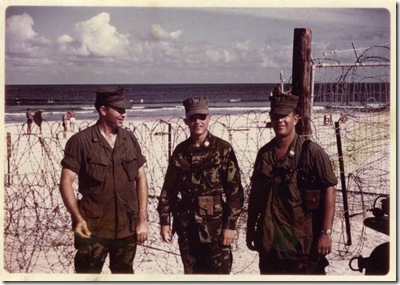
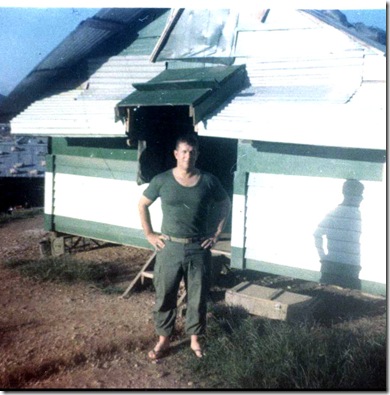
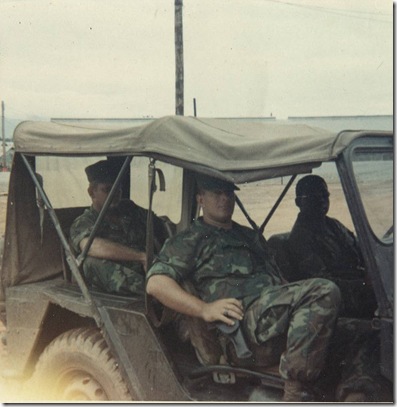
Russ at supply whse 1-13 DaNang Russ Ford at Da Nang Harbor 1969 Russ Ford Capt Gasser Steve Cox on east side of DaNang at ocean summer 1969 Russ in compound at 1-13, Inspecting area along the lines-bunker in corner Russ outside his hooch 1-13 Da Nang 1969Russ in jeep in Viet Nam 1969 Driver Cpl Bundick Sgt Flohre in back


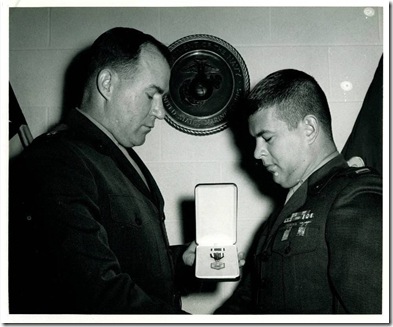
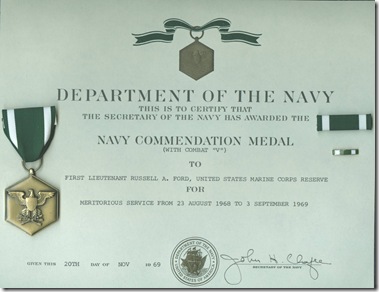
Photos below: Having returned from overseas duty, Russell was presented with the Navy Commendation Medal, earned for meritorious service during a wartime situation.

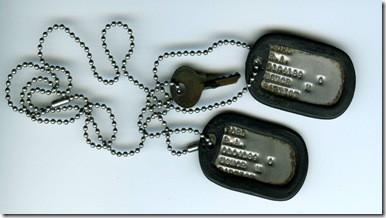
  Russ Navy Commendation Medal 1969Russell's Navy Commendation Medal Russell's Dogtags from Viet Nam 2

Thanks to my honey, and to all who have served through the years, to secure and protect my freedom.

Happy Veterans Day to My Hubby, et al

russell a ford usmc may 25 1968 May 25, 1968, Camp Lejeune, NC

My husband’s military service is a special part of his personal history, and as such, an important part of our family history. We were married in 1965, during the height of the Viet Nam War. He graduated from college in May of 1967, and having passed the qualifying test the previous winter, had been sworn in as an Officer Candidate in the United States Marines. He was commissioned as a 2nd LT in the spring of 1968, and after Officer Candidate School and The Basic School, followed by Supply School, he spent a 13-month tour of duty in Viet Nam. While in country, he was promoted to 1st LT. He was honorably discharged as a Captain, USMC.

My pride in his service to our country is only exceeded by my pride in his service to our Lord, and undermining both, is my pride in who he is. He served because he wanted to serve, because it was an honor to fulfill his patriotic duty.

One day I may write a book. For today, as we celebrate Veterans Day, I’ll just post a few pictures from the “olden days” – the days when military personnel and their loved ones could not even communicate by telephone, much less web cams, Skype, email, chat, etc. We communicated only by letter (real letters) for 10 months. Then we met in Hawaii for R&R. Then another three months of letters-only, before his return home. Yeah, THOSE “olden days.”

 2nd LT Russell Ford and Wife at OCS Graduation

Nov 1967 Newly-commissioned 2nd LT Quantico, VA

 3-13-1968 Leaving for practice amphib landing at Little Creek during TBS Training Exercise, Quantico, VA

May 25 1968 at Camp Lejeune NC

May 1968, Camp Lejeune, NC


Following pictures are from Viet Nam:

11-10-1968, USMC BDay visiting Bud Harness  in DaNang Steak Cookout center, supply office-rice paddies in bkgrnd where R engaged enemy Feb 23 1969   Hooches at 2-7 and same type as 1-13  Mtn outside Russells hooch, 1-13, west of Da Nang

Christmas Day in Viet Nam 1968  Photo of Russ Ford and Rich Gleittsman, taken at camp before Russell left for the world 1969  Russ at 3rd MAF HQ, Da Nang in bkgrnd

Russ at Camp Hansen Okinawa for Embarkation Sch Mar 1969

Russ at supply whse 1-13 DaNang Russ Ford at Da Nang Harbor 1969 Russ Ford Capt Gasser Steve Cox on east side of DaNang at ocean summer 1969 Russ in compound at 1-13, Inspecting area along the lines-bunker in corner Russ outside his hooch 1-13 Da Nang 1969Russ in jeep in Viet Nam 1969 Driver Cpl Bundick Sgt Flohre in back


Photos below: Having returned from overseas duty, Russell was presented with the Navy Commendation Medal, earned for meritorious service during a wartime situation.

  Russ Navy Commendation Medal 1969Russell's Navy Commendation Medal Russell's Dogtags from Viet Nam 2

Thanks to my honey, and to all who have served through the years, to secure and protect my freedom.